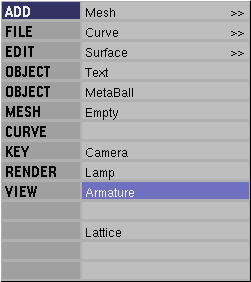
The next step is to build the skeleton or "armature" that will be used to deform the character. A single armature object can contain an entire hierarchy of bones, which makes editing animations easier. Add an armature object from the toolbox by pressing SPACE->"ADD->Armature".
You will see a yellow bone appear. You can reposition its endpoint by moving the mouse. When you are more or less satisfied with its position (you can still edit it later), LMB to finalize the bone. At this point a new yellow bone will appear, attached to the end of the first bone. You can continue to add connected bones in this fashion (Figure 22-2). If you do not want to create another bone, you can press ESC to cancel the current (yellow) bone. The bones you added previously will not be affected.
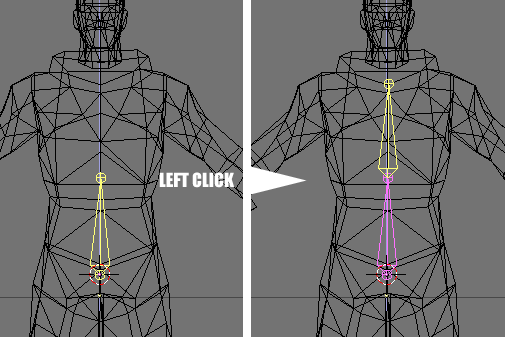 Figure 22-2. Adding bones
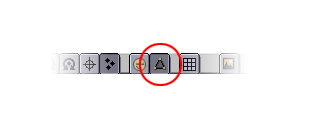
Armatures have an EditMode similar to meshes. You can determine if you are in EditMode or not by looking at the EditMode icon in the 3DWindow Header. As with meshes, you can toggle in and out of EditMode using TAB. While you are in EditMode, you can add and remove bones, or adjust the rest position of existing bones. The rest position of your armature should correspond to the untransformed position of the mesh you want to deform, and you should build the armature inside the mesh, like a skeleton inside a human body.
While you are in EditMode, you can reposition a bone by selecting one or more of its endpoints and using the standard transformation tools such as scaling (SKEY), rotation (RKEY) and translation (GKEY).
You can also extrude selected points to form new bones with EKEY.
One or more bones can be selected by selecting their start and end points. Like meshes, you can select all of the bone points within a region by using BKEY or you can select or deselect all bones in an armature with AKEY. You can also select an entire bone chain at once by moving the mouse over any one of the chain's points and pressing LKEY. Selected bones can be deleted with XKEY or duplicated with SHIFT-D.