- open photoshop
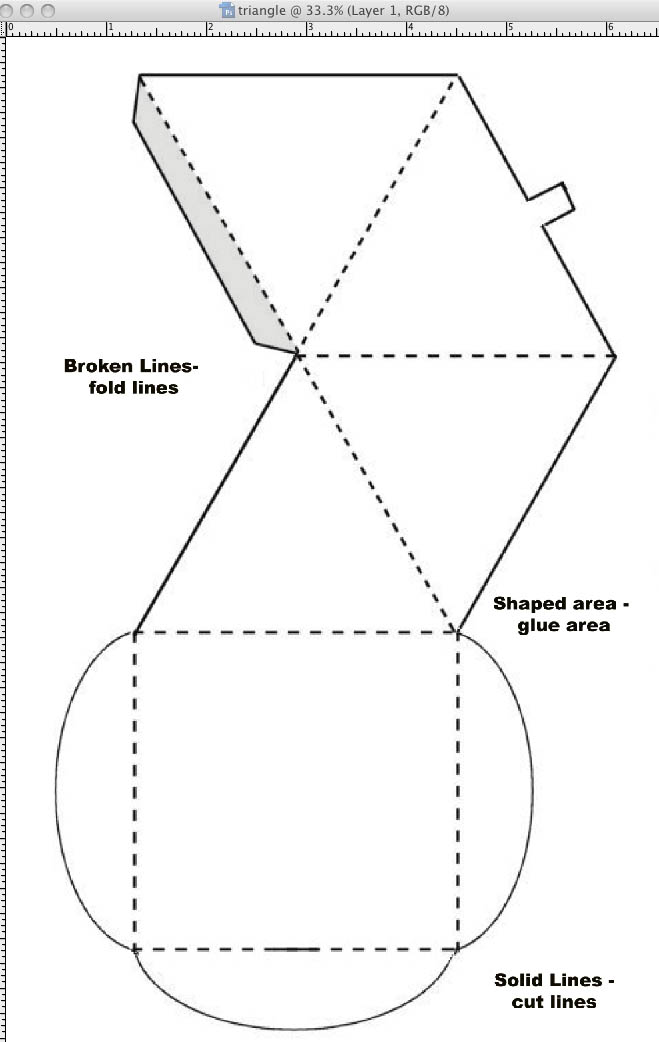
- open selected template
- save project to the student home drive
- use internet to locate suitable images
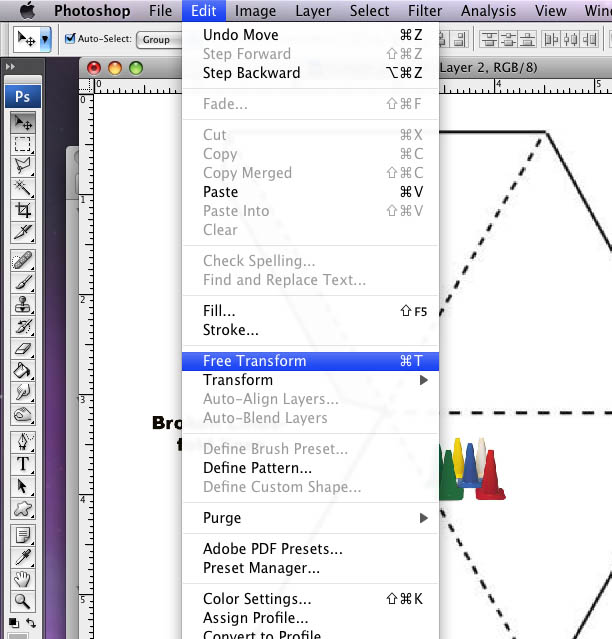
- copy the found image (on a PC Right click and on a Mac Control click) and paste (on a PC Control "v" and on a Mac Command "v") into photoshop (new layers are formed each time an object is pasted into photoshop). You may also go to the "Edit" command dropdown menu and select "paste".
- all further work will be done on the image layer.
- click on "Edit" (drop down menu) and scroll down to "Free Transform". The allows the image to be resized and positioned onto the template. Hint: hold down the Shift Key and all components of the image will be constrained preventing distortion.
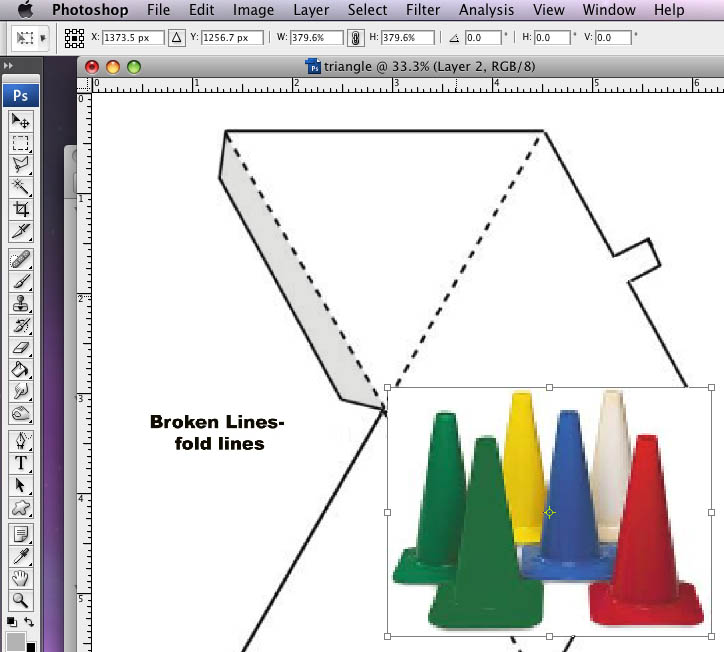
- on the "Layers" pallette locate the "Opacity" slider and move it to the left reducing the opacity to about 40%. This makes the image transparent to the point that you are able to size the outline below the image.
- resize and postion the image
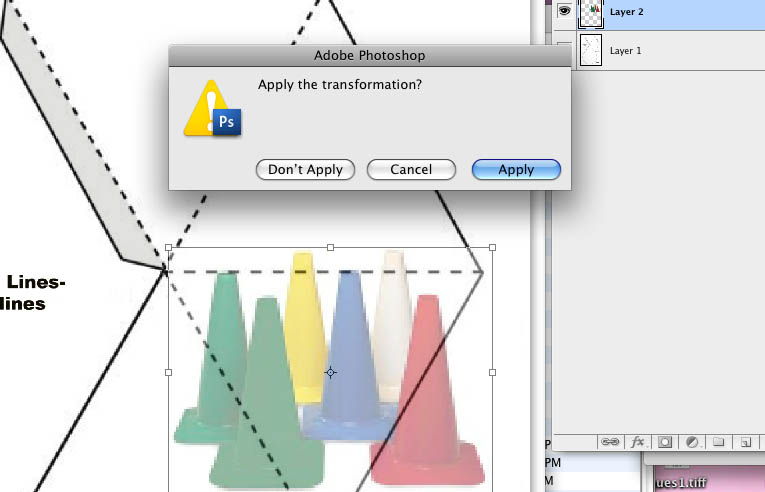
- click on the "arrow" at the top of the toolbox on the left hand side
- a pop-up will appear asking you to confirm the transformation.
- select "Apply".
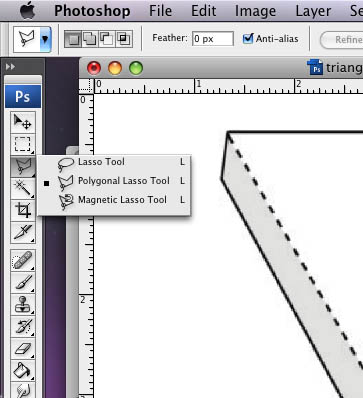
- select the "Polygon Lasso Tool" from the tool box found on the left hand side. It is the third tool down.
- If not visible just click on the the tool box ixon at this location and three different types of lasso's will appear.
- select the appropriate one.
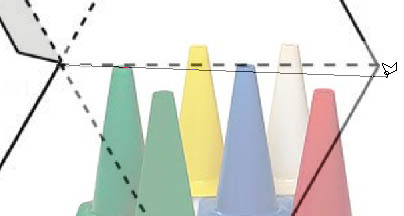
- select a starting point which is usually at a corner.
- click and drag your mouse to the next corner and click.
- continue to drag and click until you are back at the starting point having outlined the part of the template that is to contain the image.
- double click and the tracing will be complete
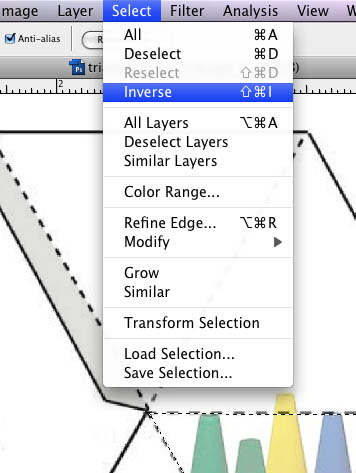
- go to the "Select" dropdown menu and select "Inverse". This procedure selects everything that is outside the area that we marked with the Polygon Lasso.
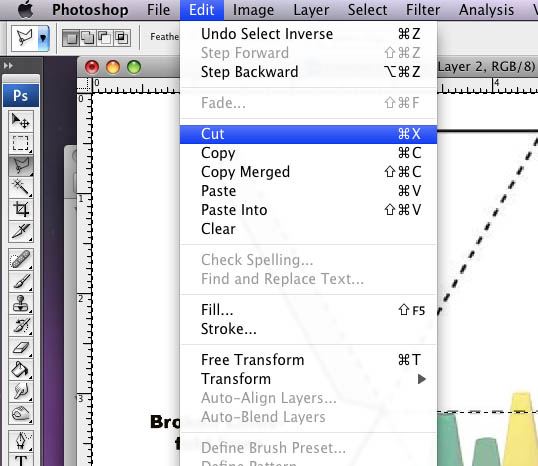
- go to the "Edit" menu and select "Cut". This will remove all parts of the image that we do not want to become part of our template.
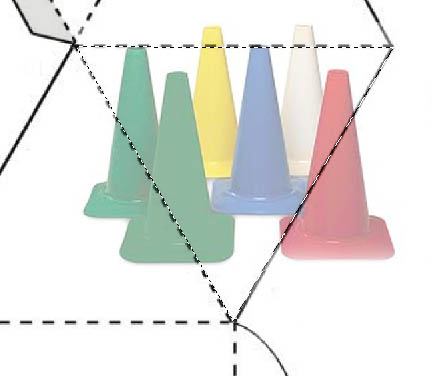
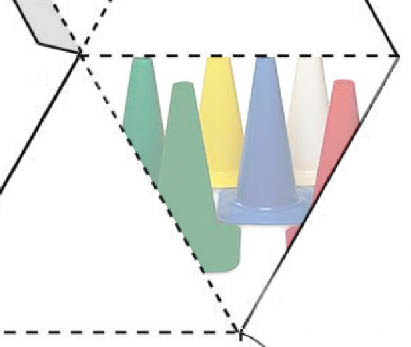
- the result is an image that now conforms to part of our template
- go back to the "Opacity"slider and move it back to 100%.
- repeat this procedure for all the remaining parts of the template.