Morphing Text
(adapted from Flash 5 by Bill Sanders and used with his
permission)
Objectives:
- to make changes to text blocks using the Break Apart
Command
- to define and save color swatches
- to morph text from one font to another
- to morph text from type to a graphic
- to outline text and morph from one outlined font to
another outlined font
- to introduce the use of the Ink Bottle Tool
Basics:
- shape tweens result in the change from one form (object or text) into a
different form
- a shape tween requires a starting keyframe and a finishing keyframe
- it is recommended that each shape tween occurs on its own layer which results
in a more predictable result
- tweening multiple shapes can result in the shapes interacting with unpredictable
results
- shape tweens must involve shapes and not groups or symbols
- shape tweens require a change in the basic attributes - stroke and fill
- if unsure if an object can be shape tweened use the Break Apart command
found in the Modify menu
- when text is broken apart the first time rectangular selection boxes appear
around each letter and indicate that the original text field has been broken
into a number of smaller fields
- text must be broken apart a second time which changes the text fields into
a graphic which can be morphed
- when text has been broken apart it can no longer be edited as if it were
a text field.
- text can only be outlined if it is a graphic
- the Ink Bottle Tool is used to change a line's stroke, color or line type
Exercise:
a) Layers
- this exercise will use three layers background, titles and morph
- the color palette for this movie will be #8CFF99 - light green, #998066
- light brown and #331900 - dark brown
- the movie will be 35 frames in length
|
 |
b) Background Layer
- click on the Selection Arrow and select
the light brown color as the background color
- select the Rectangle Tool and set the
Fill Color Well to light green and the
Stroke Color Well to white
- set the stroke to 10 point
- draw a rectangle over the stage leaving the background color visible so
that it forms a frame around the rectangle (See diagram 1)
- lock the layer
c) Titles Layer
- click on the Text Tool and select
a script font such as "Matura MT Script
Capitals"
- set the font size of 32, the color to dark brown and use Bold
- place the title "Mount Royal Collegiate Computer Animation 20"
at the top of the stage (see Diagram 1)
|
 |
- use the Align Panel and Align
Vertical from the Modify Menu
to center the text at the top of the stage
- place the slogan "Experience Imagination and Inventiveness" at
the bottom of the stage (see Diagram 1)
- use the Align Panel and Align
Vertical from the Modify Menu
to center the text at the bottom of the stage
- lock the stage
d) Morph Layer
- select frame one and click on the Text Tool
- select the Comic Sans MS font and then
set the font size to 70 , the color to dark brown and use Bold
- type the word "Before" (see Diagram 1)
- select the text
- use the Align Panel and Align
Vertical from the Modify Menu
to center the text and use the up and down arrows to center the word between
the top title and bottom slogan
- select the command Break Apart from
the Modify Menu and break the text apart.
- repeat the above procedure breaking the text apart for a second time
- click on frame 35 and insert a keyframe
- delete the broken-up "Before" graphic
- select the Sand font and keep the same
settings
- type the word "After" (see Diagram 3)
- select the text
- use the Align Panel and Align
Vertical from the Modify Menu
to center the text and use the up and down arrows to center the word between
the top title and bottom slogan
- select the command Break Apart from
the Modify Menu and break the text apart.
- repeat the above procedure breaking the text apart for a second time
- click on frame 1 and insert a Motion
tween
- test and save your movie
Morphing Text Movie
|
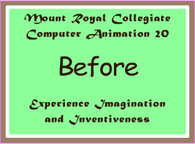
Diagram 1
|

Diagram 2
|

Diagram 3
|
e) Morphing Outlined Text to Outlined Text
- click on frame one
- select a bright pink color in the Stoke Color
Well
|
 |
- select the Ink Bottle Tool from the
Toolbox and touch each letter in the
word "before" so that each letter will have a pink outline (see
Diagram 4)
- click on frame 35
- select a bright yellow color in the Stoke Color
Well
- select the Ink Bottle Tool from the
Toolbox and touch each letter in the word "After" so
that each letter will have a yellow outline (see Diagram 5)
- the Motion tween will still be activated
- text and save your movie
Morphing Outlined Text
|
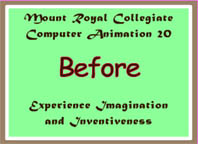
Diagram 4
|

Diagram 5
|
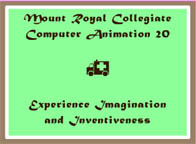
Diagram 6
|
f) Morphing From Text to Graphic
- click on frame 35
- delete the broken-up "After" graphic
- select the Webdings font and keep the
same settings
- type the letter "h" (see Diagram 6)
- select the text
- use the Align Panel and Align
Vertical from the Modify Menu
to center the character and use the up and down arrows to center the character
between the top title and bottom slogan
- select the command Break Apart from
the Modify Menu and break the character
apart.
- repeat the above procedure to ensure that the character is completely broken
apart
- the Motion tween will still be activated
- test and save your movie
Morphing Text to Graphic