Text Graphic Images &
Bitmapped Fills
(adapted from Flash 5 by Bill Sanders and used with his
permission)
Objectives:
- to introduce graphic elements found in a font set
- to modify a graphic element
- to shape tween from one graphic element to another
graphic element
- to outline text and morph from one outlined font to
another outlined font
- to introduce the use of the Eyedropper and Ink Bottle
Tool
- to use a bitmap image as a fill
- to shape tween from a bitmapped filled graphic to
another bitmapped filled object
Basics:
- fonts such as Webdings, Wingdings and Zapf Dingbats contain graphic elements
- when a text image is broken apart the graphic can be colored, filled or
changed in any way that a graphic can be altered
- shape tweens result in the change from one form (object or text) into a
different form
- a shape tween requires a starting keyframe and a finishing keyframe
- shape tweens must involve shapes and not groups or symbols
- shape tweens require a change in the basic attributes - stroke and fill
- if unsure if an object can be shape tweened use the Break Apart command
found in the Modify menu
- when text is broken apart the first time rectangular selection boxes appear
around each letter and indicate that the original text field has been broken
into a number of smaller fields
- text must be broken apart a second time which changes the text fields into
a graphic which can be morphed
- when text has been broken apart it can no longer be edited as if it were
a text field.
- text can only be outlined if it is a graphic
- the Ink Bottle Tool is used to change a line's stroke, color or line type
- the Eyedropper is used to duplicate a color
- when a selection is made using the Eyedropper Tool a change occurs in the
Fill Color Well which mirrors the selection
- when a bitmap fill is created it is stored in the Color Mixer and can be
found using the drop-down menu at the top of the Color Mixer Panel
Exercise:
a) Text Graphic Images (Movie One)
- this part of the tutorial will require the use of
one layer and no background color
- the movie will be 35 frames in length
- click on the Text Tool and select the
font "Webdings"
- set the font size of 70,
- select the font Webdings and type the
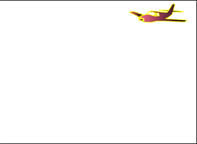
letter "j" -- a small image of a plane appears
- select the image using the Selection Tool
- select the command Break Apart from
the Modify Menu and break the character
apart.
- repeat the above procedure to ensure that the character is completely broken
apart
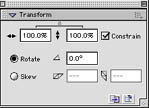
- select the Transform Panel from
the Windows Menu
- make sure the Constrain Button
is selected
- increase the size of the graphic by 300% (after value has been entered
make sure the the return has been pressed)
- set the Stoke Color Well to yellow
- use the Ink Bottle Tool to outline
each component of the graphic (it may be necessary to increase the magnification
so that this can be done more accurately)
- select the Color Mixer and use
a purple gradient fill to color the body wings and tail section of the
plane leaving the windows clear
- select Show Frame
|
 |
- select the image using the Selection Tool
and move graphic to the upper right hand corner of the stage
- click on frame 35 and insert a keyframe
- delete the image of the plane
- use the font Webdings and type the letter
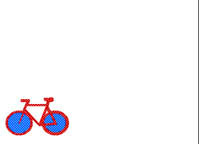
"b" -- a small image of a bicycle appears
- select the image using the Selection Tool
- select the command Break Apart from
the Modify Menu and break the character
apart.
- select the Transform Panel from the
Windows Menu
- with the Constrain Button selected increase
the size of the graphic by 300%
- set the Stoke Color Well to red
- use the Ink Bottle Tool to outline each
component of the graphic (remember to increase the magnification it necessary)
- select a blue fill in the Fill Color Well
and color the inner part of the wheels
- select Show Frame
- select the image using the Selection Tool
and move graphic to the lower left hand corner of the stage
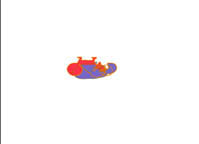
- double click on frame 1 and insert a shape tween
- test and save your movie
|

Diagram 1
|

Diagram 2
|

Diagram 3
|
Text Graphics Movie
b) Bitmapped Fills (Movie Two)
- this part of the tutorial will require the use of
one layer and no background color
- the movie will be 35 frames in length
- click on the Text Tool and select the
font "Textile" and then set
the font size to 70 , the color to black and use Bold
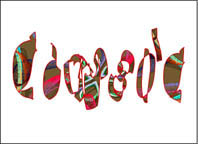
- type the word "Classic"
- select the image using the Selection Tool
- select the command Break Apart from
the Modify Menu and break the character
apart.
- repeat the above procedure to ensure that the character is completely broken
apart
- select the Transform Panel from the
Windows Menu
- make sure the Constrain Button is deselected
- increase the width of the graphic by 150% and the height by 300% (after
value has been entered make sure the the return has been pressed)(percentages
may vary with the idea that the word cover most of the stage)
- set the Stoke Color Well to red
- use the Ink Bottle Tool to outline
each component of the graphic
- add a layer
- import a graphic (picture) that will be used as a fill
- select the image and break it apart
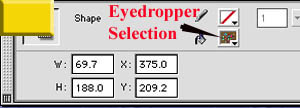
- select the Eyedropper Tool from
the Toolbox to select the entire
image
- select the layer with the imported image and delete the layer
- check that the bitmap image is still in the
Fill Color Well
- use the Paint Bucket Tool to fill
each letter with the selected bitmap fill
|
 |
- click on frame 35 and insert a keyframe
- delete the image of the word "Classic"
- click on the Text Tool and select the
font Impact and then set the font size
to 70 , the color to blue and use Bold
- type the word "Schools"
- select the image using the Selection Tool
- select the command Break Apart from
the Modify Menu and break the character
apart.
- select the Transform Panel from the
Windows Menu
- make sure the Constrain Button is deselected
- increase the width of the graphic by 150% and the height by 300% (percentages
may vary with the idea that the word cover most of the stage)
- set the Stoke Color Well to red
- use the Ink Bottle Tool to outline each
component of the graphic (remember to increase the magnification it necessary)
- select the Color Mixer Panel in the
Windows Menu and use the drop-down menu
to select bitmap
- use the Paint Bucket Tool to fill each
letter with the selected bitmap fill
- double click on frame 1 and insert a shape tween
- test and save your movie
|

Diagram 4
|

Diagram 5
|

Diagram 6
|
Bitmapped Fills Movie
