Cutting Through Steel
original - (http://www.blendernation.com/tutorials/blender-3d-intermediate-tutorial-cutting-through-steel/)
Introduction
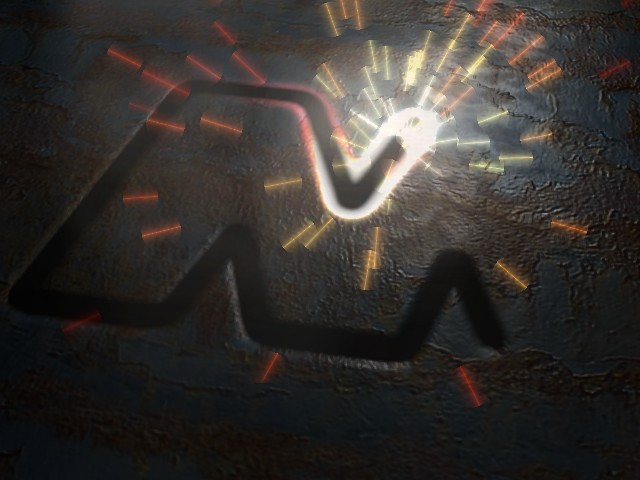
An animated texturemap for the alpha channel of a mesh, thus making it transparent.
This tutorial will introduce you to using AND creating animated texturemaps, all in Blender.
The Preparations

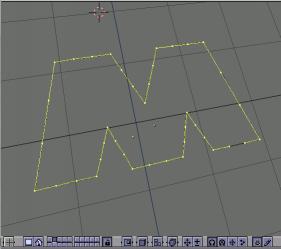
3. As you may notice, I turned my curve into polygons (this can be done in the EditButtons screen while in editmode and having selected all vertices). This isn't necessary; it's just that my logo looked better in straight lines.
4. Now I want to make a particle system that follows the curve. Create a cube, scale it down and place it on the same height as the letter M. Next, parent the cube to the letter by first selecting the cube, holding down the SHIFT key and then selecting the letter. Press CTRL-P to make the letter the cube's parent.
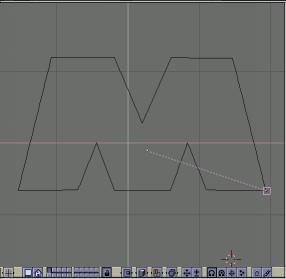
5. To make the cube move along the outline of the curve, select the curve, go to the Anim Buttons screen (F7) and select the curvePath button. The first thing that happens is that the cube translates to somewhere else:
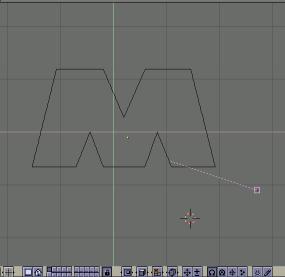
6. Now, select the cube and move it back to the start of the dotted line. If you now hit alt-a you'll see your little cube move along the curve.
Creating the animated alphamap
7. The next step is to use a particle system to create an animated texturemap. Select the cube, go to the Anim Buttons screen (F7), press the 'new effect' button and select 'particles' from the effect menu. Hit alt-A to see where we're going.
8. Add a new material to the cube, select the 'halo' button and set the halo size to 0.2. Go to frame 30, and make a test render. It should look something like this:
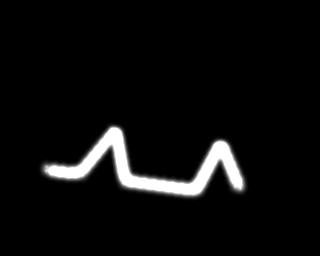
If the image is dotty, try scaling down the cube a bit. If it's all a white blur, decrease the halo size. If you look at the animation, you'll notice that the white trail builds up, but after a while it disappears again at the end. This is not what I want - I need to build up a complete white outline of the letter M.
9. To fix this, select the cube, go to the particle system settings and increase the particle life up to 200. Move the camera untill it's right above the letter M, and looking down. Select the camera, go to the edit buttons screen and select 'Ortho'. This will cause the camera to ignore perspective. This is ideal for our purpose: projecting this map onto a plane, later.
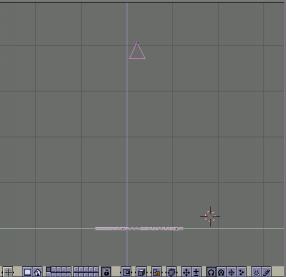
Finally, render the animation to disk; call the animation frames alphaMap.
Creating the welder
10. Next, it's time to use the alphamap. Create a new scene. To do this, locate the following button on the top of your screen:

First, rename the current scene to 'Alphamap'. Next, select the dropdown icon ('-') and add a new scene. Select 'Full Copy' and relabel the scene as 'Cutter'.
11. I'm now going to re-use the existing particle system, but make it look like an actual welder. First, I need to change the cube into a half-sphere to ensure I have some nice-looking particle emissions. Delete the cube. Add a new UVSPhere with segments and rings = 16. While still in edit mode, go to the sideview, deselect all vertices, and use box-select (BKey) to select the bottom half of the vertices:
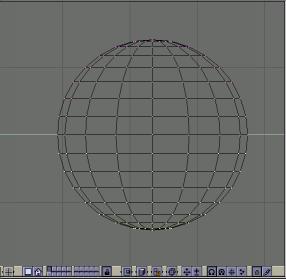
Hit XKey and remove the vertices. You now have a half-sphere. Scale it down, parent it to the curve, and grab/move it until it moves exactly over the curve. (In the same way as above). To ensure you have a nice, random particle emission from your mesh, enter edit mode, select all vertices, go to the Edit Buttons screen (F9) and hit the 'Hash' button.
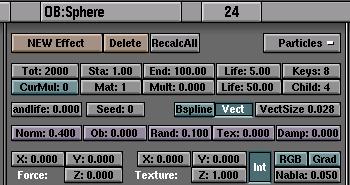
12. Next, assign a particle system to the mesh and input the following values:
- Tot = 2000
- Life = 5
- Norm = 0.4
- Rand = 0.1
- VectSize = 0.028
- Vect = on
- Here's what the particle systems settings looks like:
13. If you animate your scene, you'll notice that the particles now have a pretty violent motion. By setting the norm value to 0.4 I ensured that the particles would emit radially from the half-sphere, thus moving outward and up. Setting the particles to 'vect' and increasing their vectsize makes them look like flying sparks. Add a new material to the particle system, call it 'sparks', and set the halo size to 0.1
Adding a metal plane
14. Now it's time to add our metal plane which is eaten away by the welder. In the topview, add a plane which is about 3 times bigger than the letter M. Place it on the same height as the letter (use the frontview). Add a new material and call it 'Metal'. Add a new texture to the plane, and call it 'alphaMap'.
15. Now, assign the previously rendered animation to the texture. Go to the Texture buttons screen (F6), select the image button and load the first frame of the alphaMap animation. Set the value in the 'frames' field to 150. Select 'calcAlpha'(!).
16. Return to the materials screen, and go to the texture type section ('col, nor, csp' etc). Deselect col and turn on 'alpha', and sub. The trick now is that everywhere that the texture is white, it will 'eat away' the alpha value of your plane, thus making it transparent.
17. Also, select 'extend', so that the alpha map isn't repeated across the texture. I only want it displayed on the plane once.
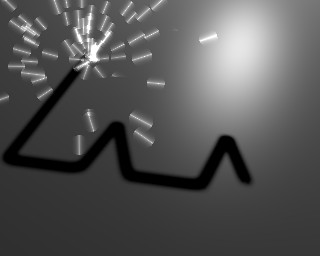
18. Now comes the part that is a bit hairy - you'll have to adjust the position and the size of the texturemap to align exactly with the letter M. To do this, select the plane and hit the TKEY. Blender will ask you whether you want to change the texture's position or the size. Play with both, rendering inbetween changes to see the result of your actions.
When you're done, you should have something like this:
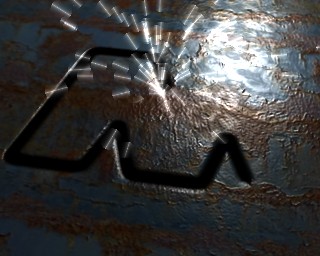
19. Now, let's add some more realism to the metal. From material and texture collection, take a metal surface texture. Assign it as a colormap AND a bump (NOR) map to the Metal material (yes, you can make one texture act as both a colormap and a bumpmap at the same time).
20. For some added fun, add marble texture as a specularity channel; this will cause the shinyness of the material to have some interesting, more natural, variations. Finally, return to the alphaMap channel of the Metal material, and select the nor button. That's right, on top of letting the animation work as an alpha channel, I'll use it to smooth off the edges of the metal as well. Try playing with the 'nor' value untill your satisfied. Your rendered result will look something like this:
Add realistic lighting
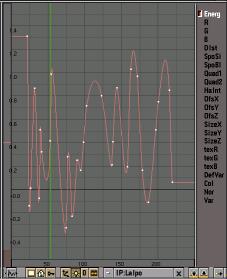
21. Okay, now for some added realism. First of all, the lighting should not be constant; if you've ever seen a welder in action, you'll know that the light it emits is highly irregular and very bright. To simulate this, create an omni light and position it slightly above the halfsphere. Parent it to the halfsphere. With the lamp still selected, open an IPO screen and select the lamp icon. Select the Energ key, and holding the CTRL key, draw random points in the IPO window by clicking your left mouse button. Don't hesitate to draw values higher than 1 or smaller than 0. When you're done, you'll have an energy graph that looks wildly different from this ;-)
Adding realism to the sparks
22. Now most sparks aren't just white. They start off whitehot, and while they fly through the air, they'll cool down, becoming more yellow, untill they turn red and then black. I can achieve this effect by applying a material IPO to the particle's material. Select the halfsphere, and open the IPO window. Select the material Icon in the IPO Window. Go to frame 1 of your animation and turn the particle material's color into bright white. With your cursor in the material window, hit the IKey, and insert an RGB key. Next, move to frame 30 and change the color into bright yellow. Insert another RGB key. Go to frame 80 and change the color to dark red. Insert a key. Finally, at frame 100, insert a key where the material is completely black. Your IPO window will look like this:
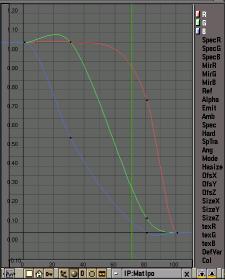
The idea behind this little exercise is that frame 1-100 of the material IPO are mapped onto the complete lifetime of the particle, in our case 5 frames. So our particles will now change color while they fly through the air.
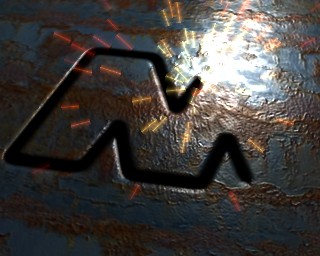
Adding realism to the melting metal
23. Well, something still isn't quite right. When metal has just been cut, it shouldn't look all dull and cool. Instead, it should be glowing and cooling down gradually. It's time to revert to our previous scene (the particles we used to create the alphamap), and duplicate it once again.
24. Add a new material to the particles. Next, like with the sparks, add a color IPO to the particles. Only this time, you'll need a completely different timing: set the keyframes on frames 3, 6, and 11. Finally, change the halo size to 0.20; this map needs to be a bit 'fatter' than the alphamap, or else you won't see a thing of it. You will get an animation that looks like this:
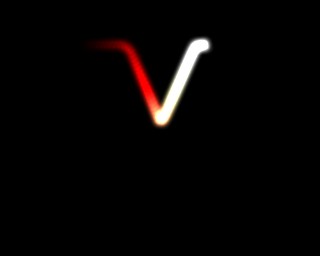
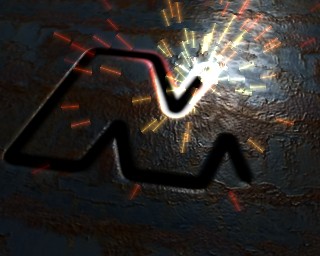
25. Render all the frames (1-150) and save them to disk at emitMap Finally, add this animated map to the Metal texture. Turn on the color and emit channels and you're ready. Here's the result:
Adding smoke
26. And now for the finishing touch! In the 'Cutter' scene, add yet another particle system. Duplicate the halfsphere, remove the existing particle system and add a new particle system. Give it the following parameters:
- Tot = 300
- Norm = 0.1
- Ob = 0.02
- Rand = 0.01
- Force z = 0.05
27. Next, create a new material and add this smoke texture . Give it halo, halotex and X-alpha, and the following parameters:
- HaloSize = 0.85
- Alpha = 0.034
- Hard = 12
- Add = 0.014
The result
