A Ride Through The Mines
http://www.blendernation.com/tutorials/blender-3d-beginner-tutorial-a-ride-through-the-mines/
Introduction
In this tutorial, we'll be playing around with curves and procedural objects a bit.
Starting off with only a handfull of shapes, we will make an animation of a ride through an abandoned mine. The technique used will allow you to make changes to the shape of the path easily and not have to worry about recreating stuff like the motion from scratch.
Start
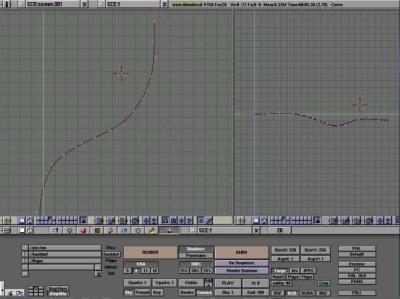
1. In the side view, add a Bezier curve. Go to the EditButtons screen, and select the button '3D'. This will allow you to move the vertices 'out of the plane', or make the curve truly 3 dimensional.
2. With the curve in editmode (TAB KEY- the vertices should be visible), add some points to the curve with CTRL-LeftMouse. When finished, you should have something like this:

3. Now, we'll attach the camera to the path. First, select the camera. Hold the shift button and select the path. Make the path the parent of the camera with CTRL - "P".
4. Next, select the path and go to the AnimButtons screen. Now, when you select the CurvePath button, the camera will move along the path. (Animate with ALT - "A").
Note: Depending on how your curve has been drawn, the camera can be displaced when you select CurvePath. Just drag it back in place - that should do the trick.
5. This is nice, but not enough - we want the camera to look in the right direction, too! Fortunately, there's a button for this, too: CurveFollow. (Make sure the cam's up vector points the right way!)
Note: For some reason, the camera will rotate 90 degrees when you select this button. As in the note above, just correct this motion and you should be fine.
Creating the rails
1. The rails will be creating by applying a bevel object to the path. In front view, create a shape for a rail - something like this:
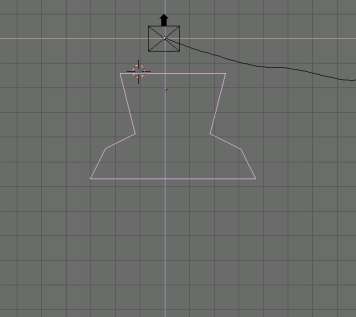
2. Scale the shape down, and duplicate it. Join the curves together by selecting them both, and pressing CTRL-J.
3. In the bottom-right of the screen, you can read the object's name. It's probably something like OB:Curve.001 (it is for me, anyway). Now select the main path, go to the edit buttons screen and enter the object name you just found in the BevObj: field. If all goes well, you're now looking at some cool rails. Chances are, though, that the rails are 90 degrees rotates relative to the rails shapes you just drew:
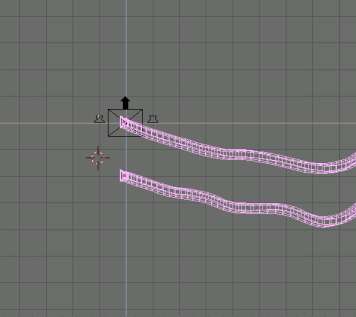
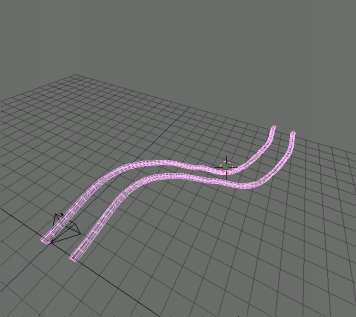
4. To correct this, select the rails shapes, enter edit mode, select all vertice ("A" KEY), and rotate them 90 degrees ("R" KEY, next hold down CTRL while dragging the mouse. CTRL will restrict the rotation angles to multiples of 5 degrees). By now, we should all be happy campers and have a model like this:
Procedural Objects
We'll use procedural objects to create some of the woodwork you find in mines.
1. Start off by creating a block, a bit wider than the two rails.
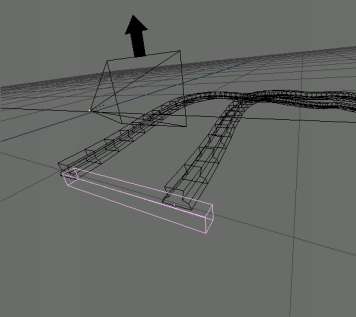
2. Make the rails the parent of the block. (Select the block, hold down the shift key and select the rails. Select CTRL - "P"). Now, when you animate, you'll notice the block is following the rails, too. Select the block, and go to the animButtons screen. Select the button called 'DupliFrames'. This option will create a 'virtual copy' of the block for each frame of the animation.
3. There are a bit too many copies right now. Increase the value of 'DupOff' until your rails looks good to you. (I used a value of 2).
|
4. Now, create a shape like this:
|
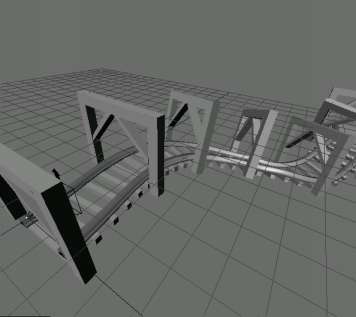
and give it some depth (set the extrude parameter if you used a curve, or use the extrude command when you've created a mesh). Again, place the shape on the beginning of the rails, make the rails the parent of this shape, and set DupliFrames. Fiddle around with the DupOff value untill you're satisfied.
Lighting
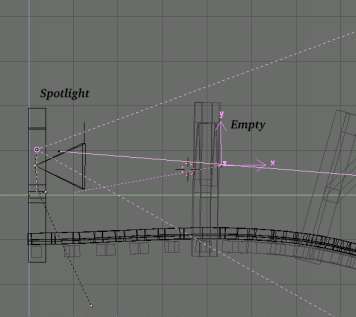
1. For lighting, create a spotlight, place it just above the camera and parent it to the camera. (Make sure it points forward ;-). This will simulate a light being mounted on your mine cart. However, because the lamp's direction will follow your viewing direction exactly, the lighting will look too artificial.
2. Create an empty, and place it a bit in front of the camera. Parent it to the rails. Select the lamp (first!) and then the empty. Select CTRL - "T" (Make Track) to make the light follow the empty. When you do this, the direction of the spotlight will probably be screwed up again. Correct this by rotating the light untill it points to the empty.
3. Select the empty, go to the AnimButtons screen and set TimeOffset to a small negative value (like -3). This will cause the empty to run 'ahead of the light' (in time).
4. The direction of the light is now uncoupled from that of the camera and the resulting lighting will look much better.
5. Finally, I've created a rock wall by making another extrusion along the path. Each path can only have ony bevel object however, so you need to duplicate the rails path first (use shift-D, NOT alt-D!), create a rock wall outline and extrude it.
|
6, Finally, after adding some decent textures and lighting, here's the result:
|