A High-Tech Corridor
http://www.blendernation.com/tutorials/blender-3d-beginner-tutorial-a-high-tech-corridor/
Introduction
In this tutorial, I'll explain how to make a high-tech corridor for fly-thru animations. It'll be a bit like the Deathstar scene from Star Wars.
Some techniques that will be used here include:
* extrusion
* duplication of objects
* lens flares
* bumpmapping
I'll assume some working knowledge with Blender. In case you find you can't follow this tutorial, please finish the Dolphin or Dice tutorial first.
Preparation: the walls
1. Fire up Blender and delete the default plane.
2. Next, add a bezier curve, go to the ***editbuttons*** screen and convert it to a polygon. ('Poly' button)
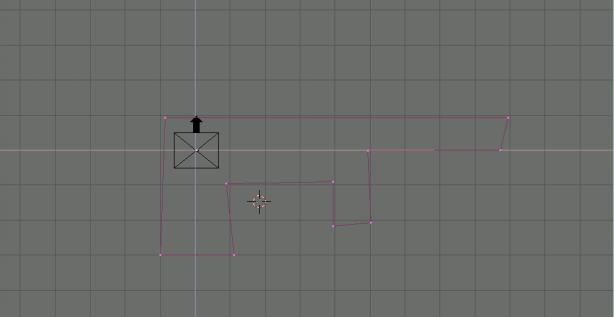
3. Rearrange the vertices to create an interesting polygon. Add vertices as needed by holding down CTRL and pressing the left mouse button. Don't worry about creating perfect straight lines yet. When you're satisfied, select "C" KEY to close the polygon.
Your screen will look something like this:
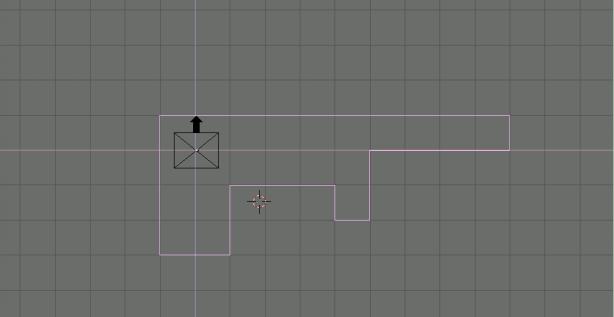
4. Now, to place all vertices on a grid vertex, enter edit mode, select all vertices ("A"KEY), and hit shift - "S". The SNAP menu will pop up - select Sel -> Grid (snap selection to grid). The polygon now looks a lot cleaner:
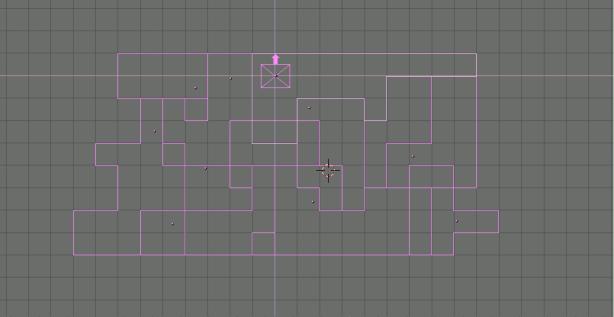
5. Now, continue creating polygons and fill a rectagular area with them.
6. Split your main view and arrange the windows in such a way, that in one window, you can see the entire shape from the front, and in the other, you see it from the side.
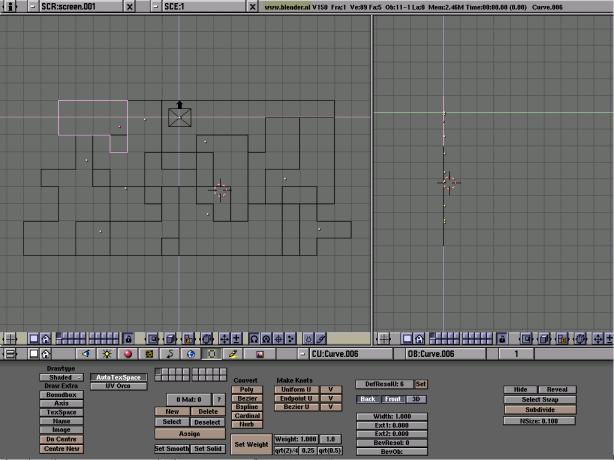
7. Select a polygon, go the the ***editbuttons screen and enter on extrusion depth for it. Repeat this for each polygon, and select a slightly different depth for each one. In this example, I used values from 0.1 to 0.5 for this.
Tip:For people with some memory/CPU power to burn, try setting the ext2 and BevResol values too - this will add some nice, rounded corners to your shapes.
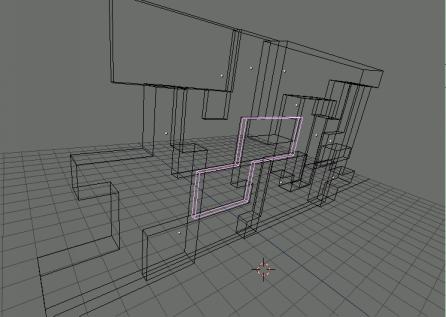
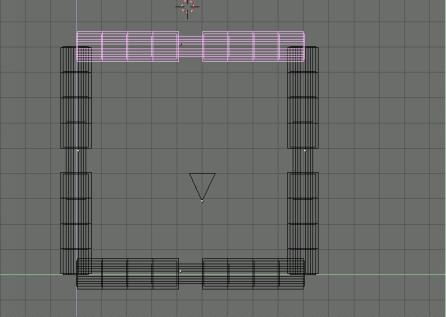
We now have completed one segment for the walls of the corridor.
Duplicating the wall segment
1. Select all wall shapes, and convert them into a mesh (ALT - "C" KEY). Select all created meshes, and join them together (CTRL - "J"). You now have one single wall segment object, which is much easier to duplicate and move than all the single pieces together.
Note 1: Do not join the polygons, because this will make their extrusion depths equal, and all the detail in the wall will be lost!
Note 2: Okay, returning to orthogonal front view, select the wall segment and duplicate it with ALT - "D". holding down the CTRL key, move it around and place it at the end of the original wall segment. Repeat this step 3 times. (You can also rotate the wall segment to create some more variation).
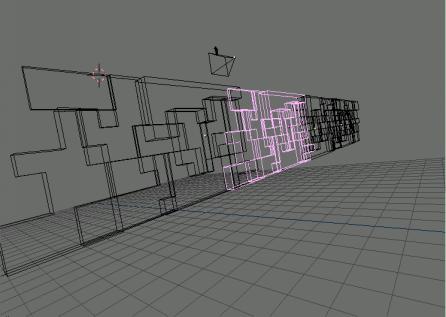
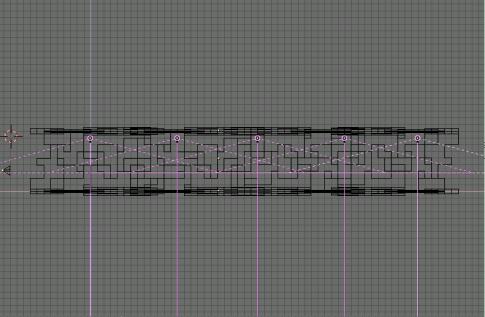
3. Next, select all wall segments and join them together. In orthogonal front view, duplicate (alt-a) the segments, and displace and rotate them to form a square:
|
As you can see, we already have a pretty impressive corridor now!
|
Painting the walls
1. Select a wall segment, and create a new material. Color: R - 0.073, G - 0.618, B - 0.8
2. Next, create a new texture. Go to the texturebuttons screen, and select a stucci texture. Set the parameters as follows: NoiseSize - 0.012, Turbulence - 0.1, Soft Noise.
3. Return to the materialbuttons screen, deselect the 'col' button and select the 'nor' button - this will turn off color mapping, and turn on bump (or normal) mapping.
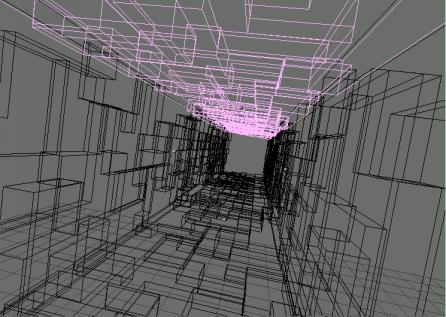
Lighting
1. Add a spotlight in the middle of the corridor, near the ceiling. Give it the following parameters: Type - Spot, SpotSi - 150, SpotBl - 0.3
2. Next, duplicate this spotlight 4-5 times and place it at regular distances apart at the ceiling:
|
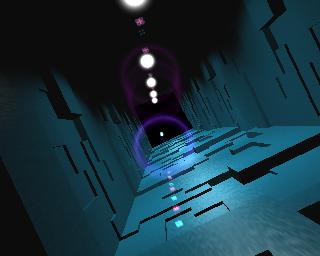
3. So far, the corridor already looks pretty good, but it still lacks some realism. In particular, the lights aren't visible and some lens flares would look good here:
|
Adding halos and flares
1. To create a visible light, add a cube to the scene and scale it down untill it has about the size of the light icon. (Smaller would be nice, too, but that would make the mesh a bit difficult to handle).
2. Create a new material, select the 'halo' button. Set the HaloSize to 0.75, Fl. Seed to 0, and Flares to 17. Other settings will generate other (and better?) results, but for now, there will do.
3. Duplicate the cube and place it on the light icons. Each light will get one 'halo-cube'.
4. Now, to make sure you'll never see the end of the corridor, add some mist to the scene: First, select the camera and select the editbuttons button. Select the 'show mist' button. This will add indicators to the camera which show where your scene mist will start and where it ends. Go to the WorldButtons window, select the 'Mist' button. Leave the Sta value at 0 (this is at which distance from the camera the mist will start). Now play with the Hi value to increase the mist range. Place the endpoint at about 75% of the corridor length. This will leave you some room to move in when you add animation to this scene.
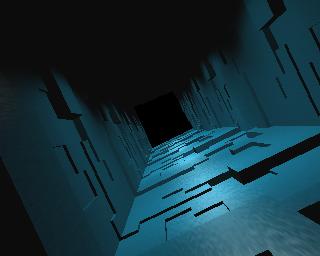
The result