Multiple Layers, Rotating,
and Skewed Motions
(adapted from Flash 5 by Bill Sanders and used with his
permission)
Objectives:
- to use multiple layers with a single object
- to use Motion tween options to set an object's rotation
- to use the Info panel, the Modify menu, and the Rotate modifications
- to use skew changes
- to create a gradient background
- to draw an object using the Line Tool
Basics:
- modification of objects can only occur on keyframes
- objects can be copied to various keyframes
- identification of the location of the necessary keyframes
- objects change position over time
- objects can be resized
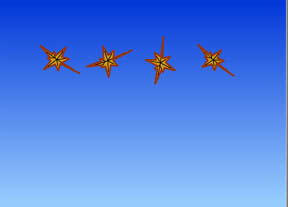
- when a leaf falls it may rotate in a clockwise or counterclockwise direction
or it may flutter and tumble
Exercise:
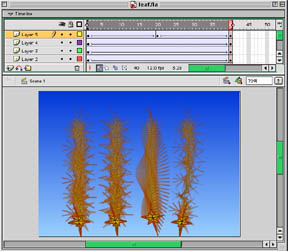
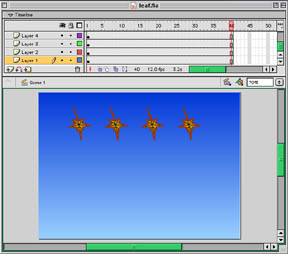 Figure One - Background
and the 4 Leaf Layers
Figure One - Background
and the 4 Leaf Layers
Layers:
- Create five layers and use the following labels for the layers: background,
leaf 1, leaf 2, leaf 3 and leaf 4.
- Click on Frame 40 and select this frame for each of the layers by holding
down the shift key and then insert frames for all the layers (Insert
Menu/Frame or shortcut F5).
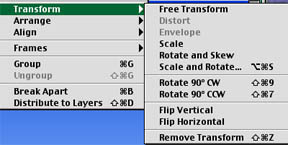
Background Layer (see Figure One)
and click on Free Transform. You
will see block handles appear in the center and along the top and bottom
of the stage. When the mouse is moved closer to a corner a circle handle
will appear and you can drag the rectangle in the appropriate direction.
- A second method is to open the Transform
Panel and select Rotate 90 CW
or 90 CCW.
- Once the gradient is in the correct position use the block handles
to resize the rectangle so that it covers the entire stage. The center
handles the used to increase the width of the rectangle and the top
and bottom corner handles are sued to reduce the height.
|
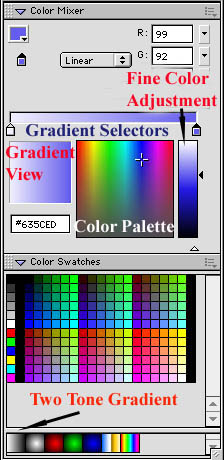
Figure Two - The Color Mixer and Swatches
|
Drawing and Positioning the Leaf
- The drawing of a leaf will involve the use of three colors: a dark
brown for the outline, a gold color for the fill and black to indicate
the views found in the leaf.
- The Line Tool will be used for
the drawing and the initial drawing will be done in the Leaf 1 layer.
- To assist in the drawing of the leaf it is suggested that you increase
the magnification to 200 or maybe even 400
- With the drawing complete use the Info Panel and set the dimensions
of the leaf at H = 90 and W = 60
- Select the Insert Menu and then
select the Convert to Symbol (shortcut
is pressing the F8 key). When the Symbol
Properties Dialog Box opens
click on the button beside Graphic
in the behaviors column. Use the name Leaf for the symbol name and click
OK. An instance of the symbol Leaf has been created.
|
|
- Position the leaf at X = 80 and Y = 60 in the Leaf 1 layer using the Info
Panel
- Make a copy of the leaf (Command C) and paste it (Command V) into the Leaf
2, Leaf 3 and Leaf 4 layers.
- Position the leaf at X = 180 and Y = 60 in the Leaf 2 layer using the Info
Panel
- Position the leaf at X = 280 and Y = 60 in the Leaf 3 layer using the Info
Panel
- Position the leaf at X = 380 and Y = 60 in the Leaf 4 layer using the Info
Panel
Leaf Transformations

a) Leaf 1 Layer
- select the leaf instance and move the playhead to Frame 40 and insert a
keyframe
- move the leaf to the bottom of the screen straight down from the beginning
position (make sure the X = value is at 80).
- double click on the first frame of this layer and select Motion
from the Tweening menu and CW
from the Rotate Menu and type "3"
in the Times Window
- the leaf should rotate three times in a clockwise direction from its beginning
position until its final position.
b) Leaf 2 Layer
- select the leaf instance and move the playhead to Frame 40 and insert a
keyframe
- move the leaf to the bottom of the screen straight down from the beginning
position (make sure the X = value is at 180).
- double click on the first frame of this layer and select Motion
from the Tweening menu and CCW
from the Rotate Menu and type "6"
in the Times Window
- the leaf should rotate six times in a counter clockwise direction from its
beginning position until its final position.
c) Leaf 3 Layer
- focus will be on Auto from the Rotate
menu. When an object's rotation or skew is changed, the Auto
selection Tweens the object through a
full range of a motion to a new rotation or skew.
- select the leaf instance and move the playhead to Frame 40 and insert a
keyframe
- move the leaf to the bottom of the screen straight down from the beginning
position (make sure the X = value is at 280).
- select Transform from the Modify
Menu and select Flip Vertically.
- double click on the first frame of this layer and select Motion
from the Tweening menu and Auto
from the Rotate Menu and type "0"in
the Times Window
d) Leaf 4 Layer
- focus will be on Skew from the Transform menu. This will create the illusion
of an object spinning on a vertical axis.
- select the leaf instance and move the playhead to Frame 20 and insert a
keyframe
- move the leaf halfway down the screen straight down from the beginning position
(make sure the X = value is at 380).
- select Transform from the Modify
Menu and select Rotate and Skew.
With the object selected drag the object until it almost disappears in a horizontal
line.
- double click on the first frame of this layer and select Motion
from the Tweening menu and CW
from the Rotate Menu and type "1"in
the Times Window
- select the leaf instance and move the playhead to Frame 20 and insert a
keyframe
- move the leaf halfway down the screen straight down from the beginning position
(make sure the X = value is at 380).
- select Transform from the Modify
Menu and select Rotate and Skew.
With the object selected drag the object until itlooks as it did in original
form.
- double click on the 20th frame of this layer and select Motion
from the Tweening menu and CW
from the Rotate Menu and type "1"in
the Times Window
Playing the Movie and Onion Skins
- The progress of the ball can be charted by moving the playhead to the beginning
and then moving it to the right, by choosing Play
from the Control Menu or by choosing the
Control Menu and selecting Debug
Movie. Once
the movie has been debugged select
Test Movie.
- To use the onion skin:
- move the play head to the last frame
- select the moving object to wish to show
- click on the Onion Skin
- select the Modify Onion Markers
drop down menu (fourth Onion Skin Icon) and choose Onion
All
- See Figure Six for an example of what the
Onion Skin would look like.
Movie of Rotating Leafs